

Dry bar installation means fitting base cabinets, a bar top, and usually a beverage fridge into a spot with no plumbing. Plan the location and measurements first, anchor the cabinets to wall studs, level everything, secure the countertop, and give the fridge a proper outlet and ventilation. Hire an electrician if you need new wiring.
There is something about a little corner of glasses, bottles,s and warm light that makes a house feel like a place for friends. A dry bar delivers that without the plumber, the drain lines, or the big renovation.
It is also one of the more forgiving projects for a confident DIYer. No water lines, no pipes in the wall, and a layout you can sketch on a napkin. It still rewards care, because cabinets that aren’t level or anchored well will bother you every day.
This guide to dry bar installation walks through the whole job: where to put it, how to measure it, what to buy, what it costs, the steps, power and lighting, and how to make it look like it belongs.
What a dry bar is (and isn’t)
A dry bar is a home bar without a sink or running water. It focuses on storage, a serving surface, and style. A wet bar adds a small sink and plumbing, which means drain lines, supply lines,s and often a plumber.
Wayfair’s explainer puts it simply: dry bars suit apartments, small homes and unused corners, while wet bars suit finished basements and entertaining spaces near existing plumbing. A dry bar can be as simple as a bar cart or as built-in as a full cabinet run with a beverage fridge.
Note that a “dry bar sink” is a different thing, a small prep sink some bars include. If you want one, you are moving toward a wet bar, and the plumbing questions return.
Pick the spot
Location decides how the bar feels, so give dry bar installation planning more time than you think you need.
Choose a place with some breathing room. A dining room wall, a living room nook, an alcove, the end of a hallway,ay or a section of basement all work. Avoid spots where people must squeeze past.
Think about traffic. The bar should be near where people gather but not on the main path to the bathroom or kitchen. If guests will stand with drinks, leave space for them.
Check the wall. You need a solid wall with studs you can find, not a thin partition with nothing behind it. Look for outlets nearby, since a fridge and lights need power.
Consider sunlight and heat. Direct sun through a window can warm bottles and fade finishes. If your room gets strong sun, sheer or lined window treatments help. See our guide to custom curtains for ideas.
Avoid placing a bar directly beside a radiator, a heat vent, or an oven. Heat is hard on a fridge and on wood.
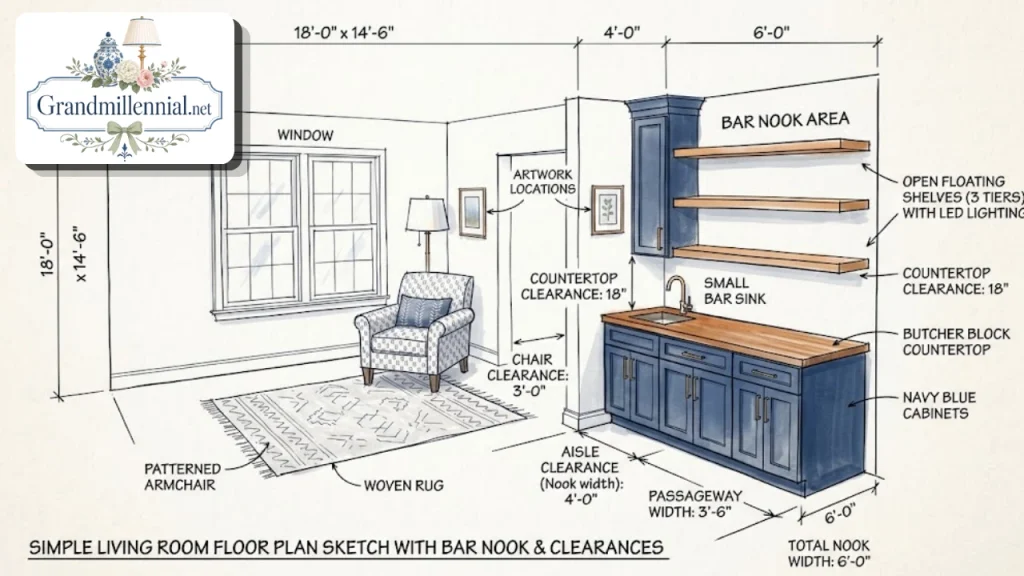
Measurements that matter
Measure twice, then once more. The numbers below are typical design guidelines, not rules, so adjust to your room and your cabinets.
| Item | Typical guideline | Why it matters |
|---|---|---|
| Base cabinet height | About 34 to 36 inches (about 86 to 91 cm) | Standard kitchen and vanity cabinets |
| Countertop height | About 36 inches with the top included | Comfortable for mixing and serving |
| Bar-height seating | About 42 inches for a raised counter | Needs matching tall stools |
| Counter depth | About 24 inches, or less for a slim bar | Fits most walls and nooks |
| Seating overhang | Roughly 10 to 12 inches if you want stools | Knee space for guests |
| Space behind stools | Enough to walk past; plan generously | Prevents bumping |
| Fridge clearance | Whatever the manufacturer specifies | Ventilation and warranty |
For the fridge, always read the manual. Under-counter beverage fridges often need specific clearances for air to move. A model built for under-counter use is different from a freestanding mini fridge, and a freestanding one can overheat if boxed in.
Measure the wall width, the ceiling height, the baseboard thickness,s and the distance to the nearest outlet. Mark the plan on the floor with painter’s tape and walk around it. You will notice problems faster than on paper.
Tools and materials
HomeServe’s guide lists the basics: cabinets, a bar top, a mini fridge, a tape measure, sandpaper, deck screws, a drill, saws, primer, paint, construction adhesive, caulk,lk and finish nails. Here is a fuller version with reasons.
| Item | Why you need it |
|---|---|
| Base cabinets (new, used or kitchen leftovers) | The body of the bar |
| Bar top (butcher block, laminate, stone or wood slab) | The serving surface |
| Stud finder and pencil | Locate where to anchor |
| Level (4 foot is ideal) | Cabinets must be level and plumb |
| Shims | Fill gaps on uneven floors and walls |
| Drill and bits | Pilot holes and screws |
| Cabinet screws (long enough to reach studs) | Secure anchoring |
| Construction adhesive | Bonds the bar top |
| Caulk and caulk gun | Finishes gaps cleanly |
| Sandpaper, primer and paint | Finishing painted cabinets |
| Dust mask and safety glasses | Protection when sanding and cutting |
| Under-counter beverage fridge | Cold storage, if you want it |
| Outlet or power strip rated for the load | Safe power |
| LED lighting | Atmosphere and visibility |
Buy a little extra of anything small, such as screws and caulk. Running to the store mid-project is the most common time sink.
If you are working with older cabinets or an older house, test for lead paint before sanding. Home test kits are available, and if the paint is lead-based, follow safe-handling guidance or hire a pro.
What it costs
Be wary of any dry bar installation price you can’t trace. HomeGnome reports an average of about $6,691 to $12,013 for installing a dry bar, compared with about $9,934 to $15,999 for a wet bar. The site says the figures come from its own pricing guide and survey, and it does not describe the sample, date, or method, so treat them as a rough guide for professionally installed bars in the United States.
DIY can cost much less, because labour is the big variable. Your cost depends on what you choose.
What moves the price:
- Cabinets: stock kitchen cabinets cost far less than custom built-ins, and used cabinets cost less still.
- The bar top: laminate and butcher block are friendlier than natural stone.
- The fridge: a basic mini fridge costs less than a built-in beverage cooler.
- Electrical work: adding an outlet or a circuit adds an electrician’s fee.
- Finishes: paint, hardware, a backsplash, and lighting add up.
- Where you live: labour and material prices differ by region.
A sensible approach is to price three levels. A budget version uses stock cabinets and a laminate or wood top. A middle version adds a better top, a quality fridge and lighting. A high-end version is custom cabinetry and stone.
Get written quotes if you hire anyone. Compare like with like, and ask what is included.
Dry bar installation, step by step
Here is the core process. Set aside a weekend for a simple bar and more for a custom one.
Prepare the space
Clear the area and protect the floor with a drop cloth. Remove baseboards if the cabinets need to sit flush to the wall, labelling them so you can put them back or trim them.
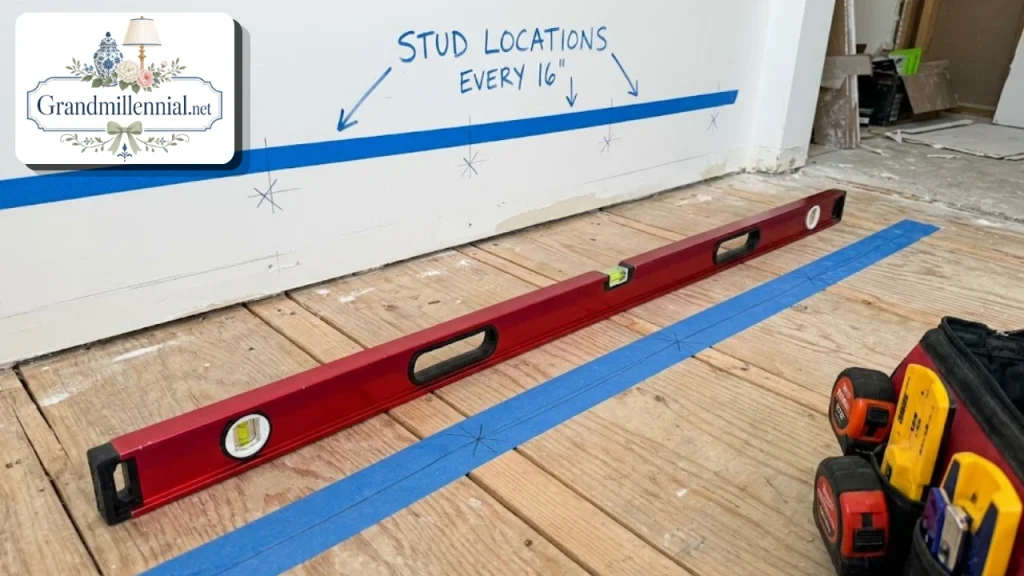
Find the studs with your stud finder and mark them with pencil. Mark the cabinet footprint on the floor and wall using your plan.
Check the floor for level. Place the level on the floor where the cabinets will sit. If the floor slopes, you will need shims.
Decide: build or buy cabinets
You can use ready-made base cabinets, cabinets from a kitchen or vanity line, or build your own from plywood. Ready-made cabinets are the easiest and most predictable.
If you want a built-in look, standard cabinets with a toe kick and a custom face frame or trim can look high-end. HomeServe’s guide notes you can build or buy the cabinets, which is a good rule: don’t build unless you are comfortable with woodworking.
If you will paint, do the painting before installing when you can. It is easier to paint cabinets in the open than inside a nook.
Position and level the cabinets
Move the cabinets into place without screwing them down. Check level from front to back and side to side. Use shims under the bottom to correct any slope. Check again.
If the wall is out of plumb, shim behind the cabinets or scribe the sides. A tight, level fit makes the countertop sit well.
If you use more than one cabinet, line up their front edges flush and clamp them together. Screw adjacent cabinet frames to each other before anchoring to the wall.
Anchor to the studs
Drill pilot holes through the cabinet’s back rail into the marked studs. Drive screws long enough to reach well into the stud. Don’t skip this step. A bar gets leaned on, loaded with bottles, and bumped by stools.
Check level again after tightening. Screws can pull a cabinet slightly out of position. Add or remove shims and retighten.
Trim shims flush with a utility knife or a small saw so they don’t show.
Install the fridge before the top
HomeServe suggests placing and powering the fridge before the cabinets, because it is harder afterward. Whichever order you pick, test fit the fridge and confirm clearances before the countertop goes on.
Leave the cord reachable. Don’t squeeze a power cord behind the cabinet where it can be pinched or overheated.
Fit the bar top
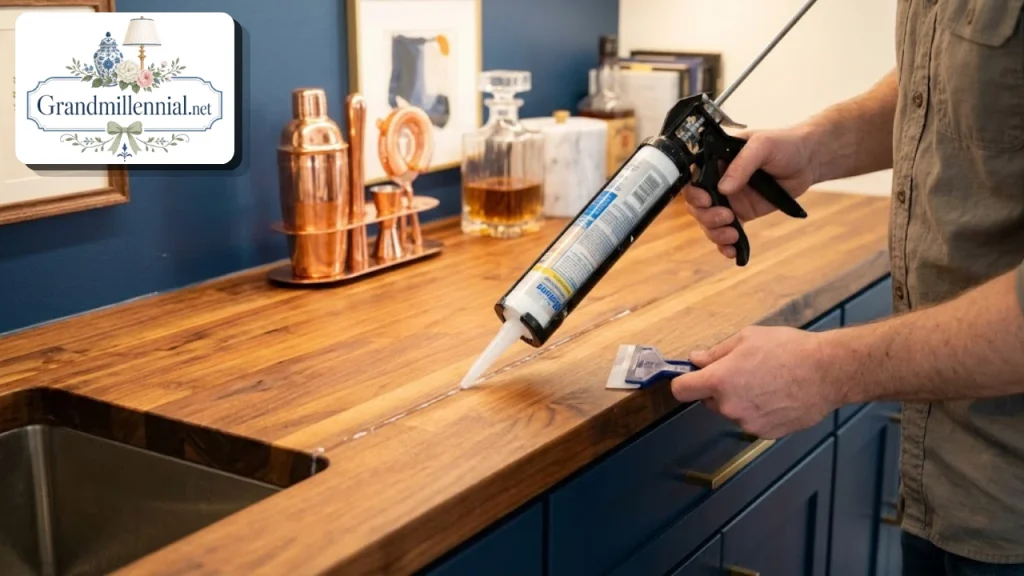
Dry-fit the top first. If it sits in a nook, HomeServe suggests cutting it a little shorter than the wall gap, about a quarter inch, and caulking the gap. That allows for wall irregularities.
Sand any cut edges. Apply construction adhesive to the top of the cabinets, set the top in place,e and center it. Add weight, such as books or paint cans, while the adhesive sets, following the product’s directions.
Check overhang. If you want stools, make sure the top extends far enough for knee space, and support the overhang if it is long. Heavy stone needs brackets or corbels beneath the overhang.
Finish and seal
Caulk the gap between the top and the wall, and between cabinets and the wall where needed. Smooth the bead with a damp finger or a caulk tool.
Seal wood tops with a food-safe finish if drinks will sit on them. Laminate and stone are easier to clean but may need sealing too, depending on the material.
Reinstall hardware, trim,im and baseboards. Wipe everything down and remove dust.
Power for a beverage fridge
This is where many dry bar installation guides go quiet, so let’s be careful.
A small beverage fridge is a modest electrical load, but it should be plugged into a proper outlet. Check the label for the amperage and any instructions about a dedicated circuit. Some manufacturers recommend it.
Don’t use a thin extension cord. Avoid daisy-chaining power strips. If you must use a power strip, choose one rated for the load, and place it where it won’t be crushed or exposed to spills.
If there is no outlet nearby, adding one is a job for a licensed electrician. Rules about outlets, circuits, and ground-fault protection differ by region and change over time, so follow local code and ask a professional.
Keep outlets accessible, not hidden behind a sealed cabinet back. A small cutout in the back panel for the cord is neater.
Lighting the bar
Lighting is what makes a bar feel like a bar. It is also the part most guides skip.
Think in three layers. Task light helps you see what you are pouring. Ambient light sets the mood. Accent light shows off glass and bottles.
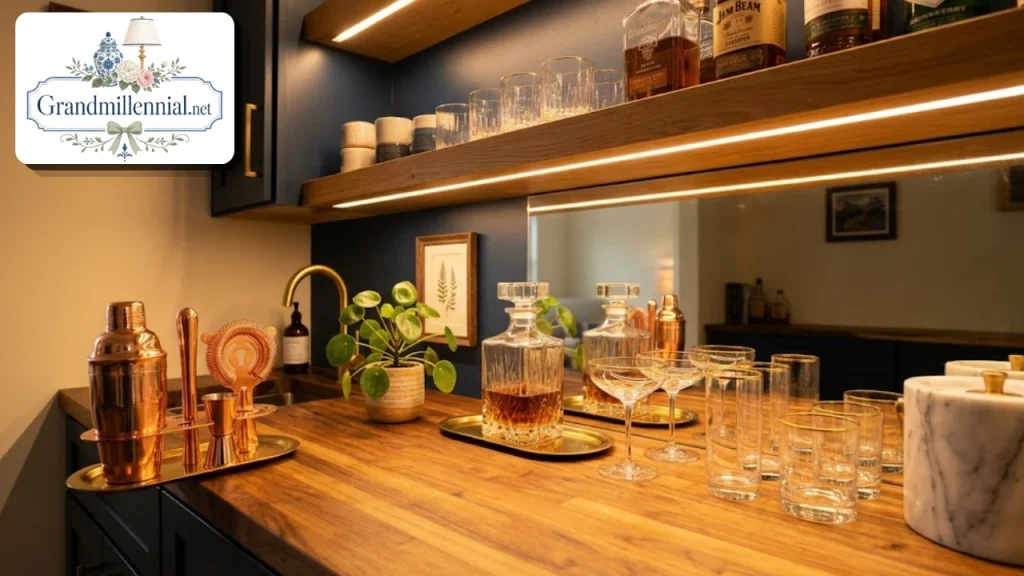
Under-cabinet or under-shelf LED strips are popular because they are cheap, slim, and give a warm glow. Plug-in or battery versions need no wiring. Hardwired lighting is neater but may need an electrician.
Choose warm white, roughly in the 2700 to 3000 kelvin range, for a cozy look. Cool white feels clinical. A dimmer lets you change the mood.
Consider a small pendant or a pair of sconces if the bar is a feature wall. Place them so they don’t glare into guests’ eyes.
Styling your dry bar
A bar earns its place when it looks good on an ordinary Tuesday, not only at a party.
Cabinet color and finish
Dark colors such as navy, forest green,n and charcoal feel moody and rich. White or soft gray feels light and fresh. If you are painting furniture or cabinets, our guide on painting furniture without sanding can save effort on pieces you are repurposing.
Hardware
Brass, matte black,ck and brushed nickel are all popular. Swapping hardware is the cheapest way to change the look.
Backsplash and wall
A tile, wood, or paneled backsplash protects the wall and adds interest. For a modern look, see our backsplash ideas, which translate well to a bar. For artwork and shelf arrangements above the bar, how to decorate walls has layout ideas.
Shelves and glassware
Floating shelves above the bar hold glasses and bottles. Mount them to studs or use proper anchors rated for the load. Group glassware by type and keep the everyday items in front.
Styling the top
Use a tray to corral bottles, a small plant or fresh herbs, a bucket for ice, and a couple of nice glasses. Leave open space to pour and set drinks down.
If the bar sits in the living room, make sure it fits the wider look. Our cozy living room guide and home decor ideas can help tie it together.
Small-space and rental-friendly options
Not everyone can drill into walls or build a nook. There are options.
A bar cart is the simplest dry bar, and you can roll it away. A narrow console table with a tray works nicely too. A repurposed sideboard or dresser can hold glasses in drawers and bottles on top.
For a more built-in look without a renovation, use a freestanding cabinet with a countertop-height top and a tall shelf above. Secure tall furniture to the wall with anti-tip hardware, especially if children are in the home.
Renters should check their lease before drilling, and use freestanding pieces if in doubt.
When to hire a pro
Know your limits. Call a licensed electrician for new outlets, new circuits,s or hardwired lighting. Call a carpenter for custom built-ins, heavy stone tops, or complex scribing.
Hire a pro if the wall behind the bar contains unknown wiring, plumbing, or ductwork, or if you find signs of moisture or mold. Don’t drill blind.
If you are adding a sink, you have crossed into wet bar territory, and a plumber is part of the plan.
Check whether your area requires a permit for electrical work or structural changes. Rules vary, and an unpermitted job can cause trouble when you sell.
Troubleshooting
| Problem | Likely cause | Fix |
|---|---|---|
| Cabinets rock or wobble | Uneven floor, missing shims | Add shims, re-level, re-anchor |
| Gap between cabinet and wall | Wall out of plumb | Shim and scribe, or caulk small gaps |
| Countertop doesn’t sit flat | Cabinets not level | Re-shim before adhesive sets |
| Fridge is noisy or warm | Poor ventilation, tight fit | Check clearances in the manual |
| Cord is visible | No cutout | Drill a neat cord hole in the back panel |
| Paint chips on cabinets | Poor prep or primer | Sand, prime with a bonding primer, repaint |
| Shelf sags | Wrong anchors or span too long | Re-anchor to studs, shorten the span |
Most issues come from rushing the leveling step. Slow down early,y and later steps go smoothly.
Mistakes to avoid
The first mistake is skipping the studs. Cabinets screwed into drywall alone can pull away over time, especially with heavy stone tops.
The second is ignoring the fridge manual. A fridge without airflow will run hard and may fail early.
The third is a bar top that is too deep or too low for stools. Test with a real stool before you commit.
The fourth is forgetting the power. Running a cord across the room is unsafe and ugly.
The fifth is poor lighting. A dim bar feels like a closet. Plan lighting from the start.
The last is overcomplicating the project. A well-done dry bar installation does not need exotic materials. It needs good measurements, a level cabinet run,un and a solid top.
Care and maintenance
Wipe spills quickly, especially on wood and stone. Use coasters for glasses. Reseal wood tops as the finish wears, following the product’s instructions.
Clean the fridge coils and vents occasionally, with the unit unplugged, to keep it running efficiently. Check the door seal for gaps.
Dust shelves and glassware regularly. Replace LED strips if they dim or flicker.
Check the cabinet screws and shelf brackets once a year. A quick tightening keeps everything secure.
FAQs:
What is a dry bar?
A dry bar is a home bar with no sink or plumbing. It offers storage, a serving surface, and often a beverage fridge, and it is cheaper and simpler to install than a wet bar.
Can I do a dry bar installation myself?
Yes, if you are comfortable with basic carpentry. Finding studs, leveling cabinets,s and fitting a bar top are DIY-friendly. Electrical work and custom built-ins are better left to professionals.
How much does a dry bar installation cost?
One cost guide reports roughly $6,691 to $12,013 for professionally installed dry bars in the United States, though its method is not described. DIY versions can cost much less depending on cabinets, top,op and appliances.
How tall should a dry bar be?
A typical dry bar is counter height, about 36 inches, or bar height, about 42 inches, if you want tall stools. Choose based on how you plan to use it.
Do I need an electrician for a beverage fridge?
Not if a suitable outlet is already nearby and the fridge’s instructions allow it. If you need a new outlet or circuit, hire a licensed electrician.
What is the difference between a wet bar and a dry bar?
A wet bar has a sink and plumbing. A dry bar does not, so it costs less and needs no plumber.
How much space do I need for a dry bar?
A small bar can fit in a nook only a few feet wide. Leave room for people to stand and pass, and check clearances for the fridge and any stools.
Where is the best place for a dry bar?
Near where you entertain, out of the main traffic path, on a solid wall with studs and a nearby outlet. Dining rooms, living rooms, basements, and hallways all work.