

Ask a contractor what’s going on with the walls, and you’ll often hear, “We’ll Sheetrock it.” The word has become so common that many people use it as a verb, a noun, and a synonym for every grey panel in the building aisle.
But Sheetrock is a brand, and understanding what it is (and what it isn’t) makes it easier to choose the right board, buy the right amount, and finish your walls well.
This guide covers the difference between sheetrock and drywall, the main types and sizes, what it costs, how to hang and finish it, and how to repair the dents, cracks, and holes that every wall eventually collects.
Quick answer: Sheetrock is a brand of drywall made by the United States Gypsum Company (USG). Drywall is the generic name for panels with a gypsum core between sheets of heavy paper. All Sheetrock is drywall, but not all drywall is Sheetrock; installation is essentially the same across brands.
Sheetrock vs. drywall: what’s the difference?
Drywall goes by many names: gypsum board, wallboard, plasterboard and, very often, Sheetrock. They all describe a flat panel made from a gypsum plaster core pressed between two layers of heavy paper.
Sheetrock is the registered brand name used by the United States Gypsum Company (USG). As Angi puts it, all Sheetrock is drywall, but not all drywall is Sheetrock. Other manufacturers make their own drywall, including Georgia-Pacific’s ToughRock and PABCO’s QuietRock sound-dampening panels.
In day-to-day use, the differences are small. A drywall finisher writing for MT Copeland notes there are no functional differences between drywall and Sheetrock, and installation technique is basically the same across brands.
What a brand does offer is a specific product range, consistent quality control, and published testing for specialised panels such as fire-rated boards. When a project’s plans call for a particular rated assembly, the exact product matters; for an ordinary bedroom wall, many brands will do the job.
A short history
Before drywall, most interior walls were made from lath and plaster, a skilled, slow, and messy process. USG introduced its gypsum wallboard under the Sheetrock name in the 1910s, according to Hunker, and it really caught on in the late 1940s.
Post-war building needed speed. Large panels that could be screwed or nailed to framing and finished in days, rather than weeks, changed how homes were built. The brand became so dominant that its name stuck as a general term.
Types of Sheetrock and drywall
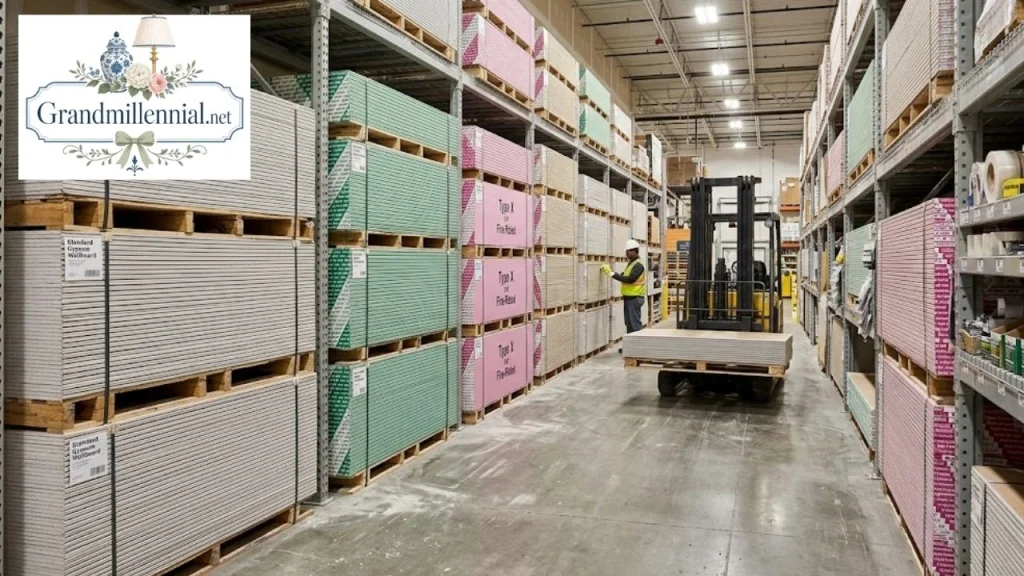
Sheetrock and other drywall brands come in several specialised types. Choosing the right one is more important than choosing the brand.
| Type | What it’s for | Notes |
|---|---|---|
| Regular | Most interior walls | The everyday choice |
| Lightweight | Walls and ceilings where weight matters | Easier to lift and hang |
| Fire-resistant (Type X, Type C) | Garages, furnace rooms, between attached garages and homes, where codes require | Thicker, with additives such as glass fibres to slow fire |
| Moisture- and mold-resistant | Bathrooms (outside wet zones), laundry rooms, basements | Resists humidity, but isn’t waterproof |
| Sag-resistant ceiling board | Ceilings | Designed to stay flat across ceiling framing |
| Sound-dampening | Media rooms, bedrooms, shared walls | Thicker or layered panels that reduce noise |
| Abuse- or impact-resistant | Hallways, playrooms, garages | Harder face resists dents |
One important distinction: moisture-resistant board is not meant for areas that get directly wet, such as shower walls. For tiled showers and tub surrounds, cement board or another approved tile backer is the standard choice.
Sizes and thickness
Drywall comes in a range of thicknesses, typically from ¼ inch to ⅝ inch for most homes, with ½ inch the most common, according to Hunker.
| Thickness | Typical uses |
|---|---|
| ¼ inch | Covering old plaster or damaged walls; curved surfaces |
| ⅜ inch | Repairs, remodels and some curved work |
| ½ inch | Most interior walls; many ceilings with sag-resistant board |
| ⅝ inch | Ceilings, fire-rated (Type X) assemblies, better sound control |
The most common sheet size is 4 × 8 feet, which is easy to handle and transport. Longer 4 × 10 and 4 × 12 sheets mean fewer seams to finish, but they’re heavy and awkward for one person. Some manufacturers also offer 54-inch-wide panels for 9-foot walls.
Weight matters more than people expect. A standard ½-inch 4 × 8 sheet is heavy enough that two people are safer for ceilings; lightweight panels make a real difference. Check the weight on the label before planning a solo job.
How many sheets do you need?
Measure the length of each wall and multiply by its height to get square footage. Add the ceiling area. Divide the total by the area of one sheet (32 square feet for a 4 × 8), then add about 10 to 15 percent for waste and cut-outs.
For example, a 12 × 12-foot room with 8-foot walls has about 384 square feet of wall plus 144 square feet of ceiling, or 528 square feet in total. That’s about 17 sheets of 4 × 8, or 19 to 20 with a waste allowance.
Which board for which room
| Room or area | Recommended board |
|---|---|
| Living rooms and bedrooms | Regular or lightweight ½ inch |
| Ceilings | Sag-resistant ½ inch or ⅝ inch, as framing and codes require |
| Bathrooms (outside showers) | Moisture- and mold-resistant board |
| Showers and tub surrounds | Cement board or approved tile backer, not drywall |
| Garage walls shared with the house | Fire-resistant board as required by local code |
| Basements | Moisture- and mold-resistant board, once moisture problems are solved |
| Media rooms and shared walls | Sound-dampening board or ⅝ inch with insulation |
| Hallways and kids’ rooms | Abuse-resistant board where dents are likely |
Building codes vary, especially for fire-rated walls between garages and living spaces. Check with your local building department if you’re unsure.
What Sheetrock costs
Sheetrock prices vary by region, thickness, type, and timing. Two current reference points:
eLocal, citing HomeGuide, puts a standard drywall panel at about $8 to $20, with Sheetrock-brand panels generally slightly higher at about $12 to $20.
Angi data quoted on AOL gives most drywall at roughly $0.40 to $0.65 per square foot, with Sheetrock brand at about $0.62.
Specialty panels such as fire-rated, mold-resistant, and sound-dampening board cost more. If you hire professionals, labour for hanging and finishing usually exceeds the cost of the panels themselves.
Tools and materials
For a typical DIY project, you’ll need:
- Drywall panels and drywall screws (coarse thread for wood studs, fine thread for metal studs)
- Screw gun or drill with a drywall dimpler bit
- T-square, tape measure, utility knife, and pencil
- Drywall saw or rotary tool for outlets and openings
- Drywall lift (rentable) for ceilings
- Joint compound: setting-type (powder) and premixed (bucket)
- Paper or fiberglass mesh tape, and corner bead for outside corners
- Taping knives (6, 10 and 12 inch) and a mud pan
- Sanding sponge or pole sander, dust mask and eye protection
How to hang Sheetrock
Follow the manufacturer’s installation guide for your specific panels; fastener spacing and framing requirements vary by product and use. The general process for hanging Sheetrock looks like this.
Prepare the framing
Check that studs and joists are straight and flush. Mark stud locations on the floor and ceiling so you can find them once panels cover them. Make sure electrical boxes, insulation, and any vapour barrier are in place and inspected if required.
Hang the ceiling first
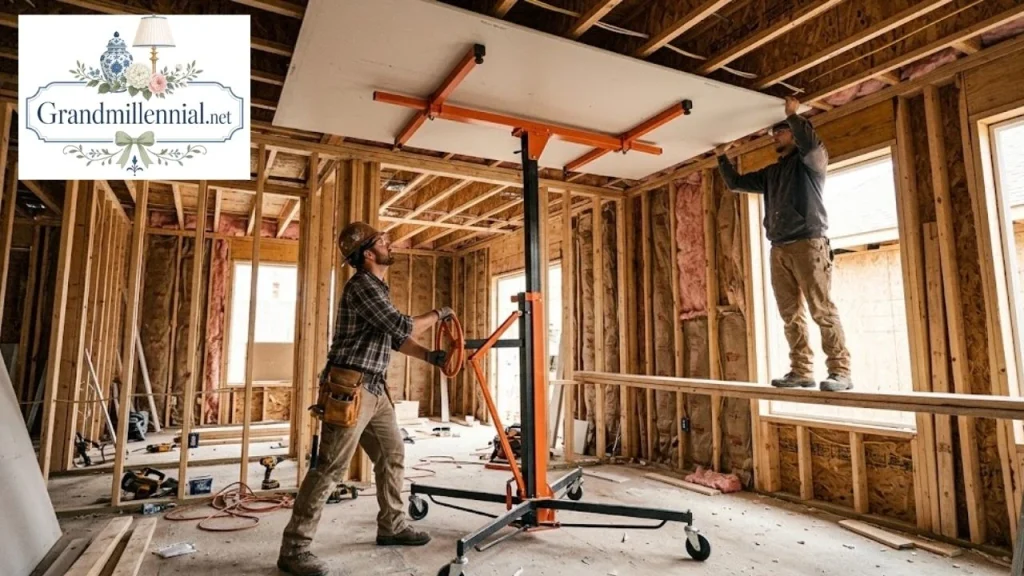
Ceilings go up first so the wall panels can help support their edges. Use a drywall lift or a helper. Run panels perpendicular to the joists and stagger the end joints so seams don’t line up.
Hang the walls
On most walls, panels are installed horizontally, with the top sheet tight against the ceiling. This usually reduces seam length and puts the tapered edges at a comfortable height for finishing. Leave a small gap (about ½ inch) at the floor, which the skirting board will cover.
Fasten correctly
Drive screws so the heads sit just below the surface, creating a slight dimple without tearing the paper. Space screws as the manufacturer recommends; many guides call for closer spacing on ceilings than on walls. Keep screws a short distance from panel edges.
Cut cleanly
To cut a panel, score the face paper along a T-square with a utility knife, snap the board along the line, then cut through the back paper. For outlets and windows, measure carefully or use a rotary tool once the panel is lightly fastened.
Avoid joints at door and window corners
Where possible, run panels across the corners of doors and windows, cutting an L shape, rather than placing a seam at the corner. Seams at corners are a common source of cracks later.
Taping and finishing
This is where patience matters most. Good finishing makes Sheetrock walls look seamless; rushed finishing shows through every coat of paint.
Install corner bead
Fasten metal or paper-faced corner bead to all outside corners, keeping it straight and flush.
Tape the seams
Apply a thin layer of joint compound over each seam, press paper tape into it, and smooth it with a 6-inch knife, squeezing out excess compound. If you use self-adhesive mesh tape, pair it with setting-type compound for strength. Fold paper tape for inside corners.
Fill screw dimples
Cover every screw head with a thin swipe of compound. Expect to do this on each coat.
Apply the second and third coats
Once dry, apply a wider coat with a 10-inch knife, feathering the edges further out. A third coat with a 12-inch knife blends the seams into the surrounding wall. Thin coats sand far more easily than thick ones.
Sand lightly
Sand between coats only enough to remove ridges and tool marks, using a fine sanding sponge or pole sander. Avoid sanding through to the paper. Wear a dust mask; drywall dust is fine and gets everywhere.
Prime before painting
Use a drywall primer before painting. It seals the paper and compound so the paint looks even, rather than showing patchy “flashing” over the seams.
Finish levels and paint
The Gypsum Association defines finish levels from 0 to 5, a useful way to decide how smooth your walls need to be.
| Level | What it involves | Where it’s used |
|---|---|---|
| 0 | No taping or finishing | Temporary construction |
| 1 | Tape embedded in compound | Above ceilings, unseen areas |
| 2 | Tape plus one coat; screws covered | Garages, areas to be tiled |
| 3 | Two coats over tape and screws | Walls to receive heavy texture |
| 4 | Three coats, sanded smooth | Most homes, under flat or eggshell paint |
| 5 | Level 4 plus a thin skim coat over the entire surface | Glossy paint, strong side lighting, high-end finishes |
For most living spaces, level 4 is the norm. If you’re planning a satin or gloss finish, or a wall washed by light from a big window, level 5 hides imperfections that would otherwise show.
Once the walls are smooth and primed, the fun part begins. These ideas for decorating walls help you turn plain new walls into a room with personality.
Repairing Sheetrock
Even perfectly finished Sheetrock walls collect damage. Here’s how to handle the common problems.
Nail and screw pops
Pops happen when fasteners work loose as framing shrinks or moves. Drive a new screw a couple of inches away to pull the panel tight, then reset or remove the popped fastener, fill both with compound, sand, and paint.
Hairline cracks
Cracks at seams or corners often mean the tape has failed. Scrape away loose material, apply a thin layer of compound, embed new tape, then finish with two thin coats.
Small holes
Fill dents and nail holes with lightweight spackle, let dry, sand lightly, and touch up the paint.
Medium holes
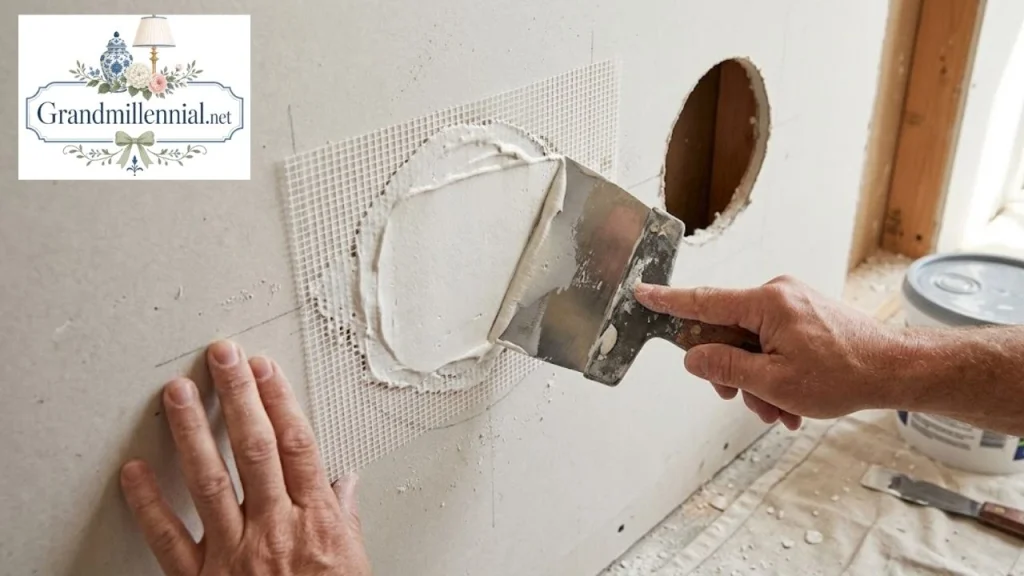
Use a self-adhesive mesh patch over the hole, then cover it with two or three thin, feathered coats of compound.
Large holes
Cut the damaged area into a neat square or rectangle. Screw wood backing strips inside the opening, fasten a new piece of drywall to them, then tape and finish the seams like any other joint.
Water damage
Fix the leak first. Drywall that has stayed wet, crumbles, or shows mold should be cut out and replaced rather than painted over. Make sure framing and insulation behind it are dry before closing the wall.
Mistakes to avoid
A few mistakes cause most Sheetrock headaches.
Overdriving screws: tearing the paper weakens the hold and leads to pops.
Lining up end joints: stagger them so seams don’t form a long, visible line.
Seams at door and window corners: they almost always crack.
Thick coats of compound: they shrink, crack, and take forever to sand.
Over-sanding: sanding through to the paper creates fuzzy patches.
Skipping primer: paint flashes over seams without it.
Using drywall in showers: use cement board or another tile backer instead.
Covering old plaster, paneling or damaged walls
Older homes often have cracked plaster or dated wood paneling. Rather than tearing everything out, which is messy and dusty, many renovators cover the old surface with thin ¼-inch or ⅜-inch drywall.
First, make sure the existing wall is solid. Screw loose plaster back to the framing, remove anything crumbling, and locate studs with a stud finder so your screws reach real framing, not just the old surface.
You’ll need longer screws to pass through both layers, and you may have to extend electrical boxes and adjust door and window trim to suit the thicker wall. If the house is old enough that lead paint or asbestos-containing materials are possible, test before sanding or demolishing anything.
Smooth walls vs. texture
Not every wall needs a perfectly smooth finish. Wall and ceiling textures, such as orange peel, knockdown, or skip trowel, are common in many regions and can hide small imperfections.
Texture is sprayed or troweled on over taped and coated drywall, usually at finish level 3. It’s faster to achieve than a flawless level 4 or 5 finish, but harder to patch invisibly later, because matching a texture takes practice.
Smooth walls suit traditional and grandmillennial interiors, where wallpaper, panelling and paint colour do the decorative work. If you plan to hang wallpaper, a smooth, primed surface gives the best result and makes future removal easier.
DIY or hire a pro?
Hanging drywall is heavy but straightforward; finishing is where skill really shows. Many homeowners hang the panels themselves and hire a finisher for taping and coating, which can be a good balance of savings and results.
A single room usually takes a DIYer several days from hanging to paint-ready, mostly because each coat of compound needs time to dry. A professional crew may complete the same room in far less hands-on time, though drying time still applies.
Consider a professional if you’re working on large ceilings, fire-rated walls required by code, curved walls, or a room where you want a level 5 finish under glossy paint.
Safety and cleanup
Drywall work is dusty. Score-and-snap cutting creates far less dust than power-sawing, so use a utility knife wherever you can.
When sanding, wear a well-fitted dust mask or respirator and eye protection, seal off doorways with plastic sheeting, and turn off forced-air heating or cooling so dust doesn’t spread through the house. A vacuum sander or a damp sponge for final smoothing helps keep dust down.
Lift with your legs and get help with full sheets, especially on ladders and ceilings. Keep children and pets out of the work area until cleanup is done.
Planning a bigger project?
If drywall is part of a larger renovation, sequence matters: plumbing, electrical, insulation, and inspections should be complete before the walls close up. These smarter renovation tips and this guide to home additions cover planning the order of work.
In kitchens and bathrooms, think ahead about what finishes will go on the walls. Tile backsplashes and vanities affect where moisture-resistant board or cement board is needed; these modern kitchen backsplash ideas and small bathroom vanity ideas can help you plan.
For most homeowners, Sheetrock projects are very achievable with patience, and finishing is where hiring help is most often worth it if you want flawless results.
FAQs:
Is Sheetrock the same as drywall?
Sheetrock is a USG brand of drywall. All Sheetrock is drywall, but drywall is also made by other manufacturers.
What thickness of Sheetrock is best for walls?
½-inch board is standard for most interior walls. ⅝-inch board is common for ceilings, fire-rated assemblies and better sound control.
Can you use Sheetrock in a bathroom?
Yes, moisture- and mold-resistant board is suitable outside wet zones. Use cement board or an approved tile backer in showers and tub surrounds.
How much does a sheet of Sheetrock cost?
Roughly $12 to $20 per standard panel according to HomeGuide data, with specialty panels costing more. Prices vary by region and time.
Should drywall be hung horizontally or vertically?
On many walls, horizontal installation reduces seams and makes finishing easier. Follow the manufacturer’s guide and local practice.
How long does joint compound take to dry?
Premixed compound typically needs about a day per coat, depending on humidity. Setting-type compound hardens on a set schedule printed on the bag.
What is a level 5 drywall finish?
A level 4 finish plus a thin skim coat over the entire surface, used under glossy paint or strong side lighting.
Can I paint directly over new drywall?
Prime first. Primer seals the paper and compound so paint dries evenly.
Can I put drywall over plaster?
Often, yes. Thin ¼- or ⅜-inch board can be screwed through solid plaster into the framing. Secure loose plaster first, and test older homes for lead or asbestos before disturbing old surfaces.
Is Sheetrock fire resistant?
Gypsum board naturally resists fire, and Type X and Type C panels are made for rated assemblies such as walls between garages and living spaces. Check local codes for where they’re required.