

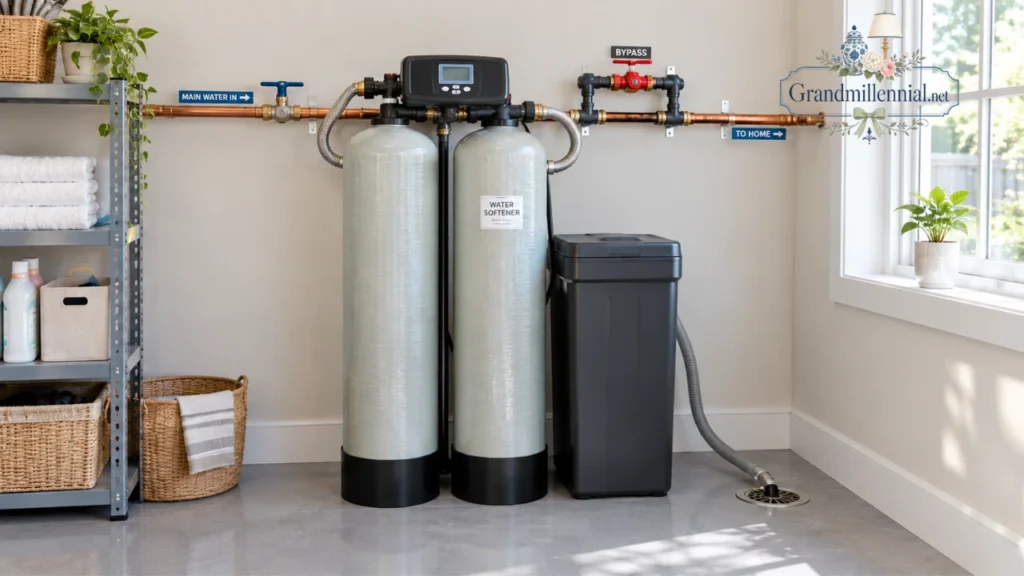
The boxes are in the garage: a tall resin tank, a squat brine tank, and a bag of fittings that looks more complicated than it is. Now comes the part most buying guides skip.
This guide picks up where the decision ends. You’ll learn which features are worth paying for, where a home water softener belongs in your plumbing, and how to install and start it up without a puddle on the basement floor
Quick answer: Install a water softener on the main cold line, after the main shutoff and before the water heater (on wells, after the pressure tank). Use a bypass valve, run the drain hose to a floor drain or laundry tub with a 1.5-inch air gap, then flush the system and program your water hardness
Before you buy: five features that matter
Spec sheets throw a lot at you. Five features decide whether a home water softener will serve you well for years, and the rest is mostly marketing.
Independent certification. Look for NSF/ANSI 44 certification or the Water Quality Association Gold Seal. Both mean the unit’s softening claims and materials were tested against a standard.
A metered (demand-initiated) valve. It regenerates based on the water you actually use, not on a fixed timer. That usually means less salt and less wastewater than older timer models.
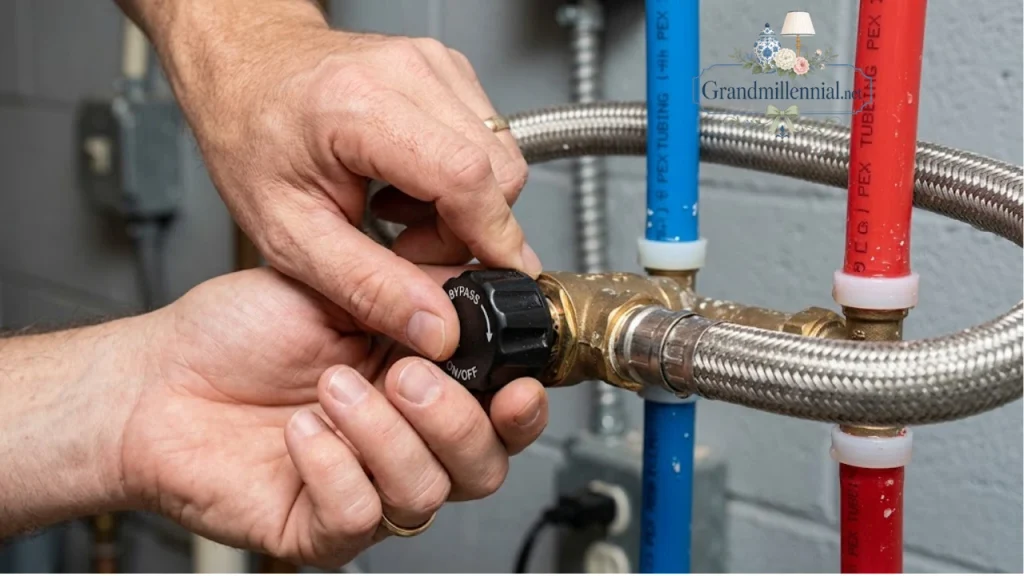
A bypass valve. It lets you turn off softening while keeping water flowing to the house, which you’ll want for maintenance or watering the garden. Most units include one; if yours doesn’t, buy one.
The right capacity. Size it to your hardness and household, not to the biggest model on the shelf. A quick rule is people × about 90 gallons a day × hardness in grains per gallon × 7 days, the planning formula used by This Old House.
A warranty you can read. Compare tank, resin and control-valve coverage separately. The valve is the part most likely to need service
Where it goes in your plumbing
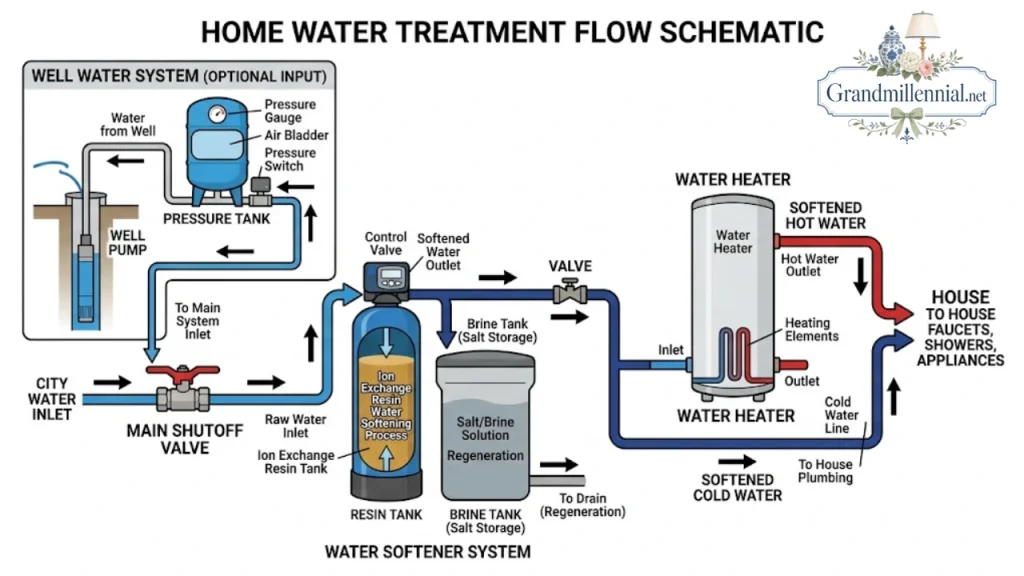
Placement is the one decision you can’t easily undo. A home water softener sits on the main cold-water line, close to where the water enters your house
On city water, the order is: main shutoff softener water heater and the rest of the house. Installing before the heater protects it from scale, which is one of the main reasons people soften in the first place.
On well water, the softener goes after the pressure tank, and after any sediment or iron filter. The softener needs steady pressure, and pre-filters protect the resin from grit
You’ll also need three things within reach: a drain (floor drain, laundry tub or standpipe), a standard electrical outlet for the control valve, and a level floor that won’t freeze
DIY or plumber? An honest check
If you’ve replaced a faucet or plumbed a washing machine, a softener install is usually within reach. Installers commonly report two to four hours for a straightforward job
It gets harder if your main line is soldered copper in a tight space, if there’s no drain nearby, or if the outlet is on another floor. Push-to-connect fittings make copper and PEX easier, but they still need clean, square cuts
Call a licensed plumber if any of these apply:
- Your area requires a permit for water treatment equipment
- The main line is galvanized steel or shows corrosion
- You’d need to move gas lines or the water heater
- There’s no legal drain within reach of the drain hose
- You’re not confident shutting off and draining the house water
If you do hire out, This Old House reports professional installation labor typically runs $150 to $1,000, with most jobs between $500 and $700.
How to install a home water softener
Installing a home water softener follows the same nine steps on most brands. Check your manual at each one, since small details such as which port is the inlet vary.
Shut off water and protect the water heater
Close the main shutoff and open a low faucet to drain the lines. If you’ll be draining the lines, switch an electric water heater off at the breaker, or set a gas heater to its vacation or pilot setting, until water is restored.
Position and level the tanks
Set the resin tank and brine tank side by side near the main line, drain, and outlet. Use shims to level them on a firm surface, away from direct sun and freezing temperatures.
Fit the bypass valve
Lightly coat the O-rings with silicone grease and push the bypass valve firmly into the control valve. Secure it with the clips supplied.
Cut into the main line
Mark a section of the main cold line where the softener’s inlet and outlet will connect. Cut cleanly with a pipe cutter and keep a bucket underneath for the water left in the pipe.
Connect the inlet and outlet
Attach the flexible connectors to the bypass valve, then to the pipe. Water from the street or well goes to the inlet; the outlet feeds the house. Most valves have arrows; follow them.
Support the pipes so their weight doesn’t hang on the valve. Strain on plastic fittings is a common cause of slow leaks.
Run the valve drain line
Clamp the drain tubing to the valve’s drain fitting and run it to a floor drain, laundry tub or standpipe. Secure the end firmly, because water leaves under pressure during regeneration.
Leave an air gap of at least 1.5 inches between the end of the hose and the drain, as manufacturers such as GE specify. The gap stops wastewater from siphoning back into your softener and drinking water.
Connect the brine-tank overflow
The overflow is a separate safety line from the brine tank. It works by gravity, so it must run downhill all the way to the drain and should never be tied into the valve drain line.
Connect the brine line
Push the brine tube from the brine tank’s safety valve into the control valve’s brine port, and tighten the fitting as the manual describes.
Restore water slowly and flush
Put the softener in bypass and turn the main water back on. Check every joint for drips.
Start a manual regeneration or backwash cycle, then slowly open the bypass valve partway. Air and fines will spit out of the drain line; once the flow runs steady, open the valve fully.
Start-up and programming: the first 24 hours
A home water softener is only as good as its settings. Most of the problems people blame on the unit are actually start-up mistakes.
| Task | What to do |
|---|---|
| Add water and salt | Follow the manual for the starting water level, then fill salt to a few inches above the water line |
| Set the clock | Regeneration runs at a set time, often overnight when nobody uses water. |
| Enter hardness | Use your measured hardness in gpg; if you have iron, ask the manufacturer how much to add |
| Run a full regeneration | This prepares the resin and confirms the drain and brine lines work. |
| Check for leaks | Look at every joint after 1 hour and again the next morning. |
| Test the water | Use a hardness test strip at a softened tap the next day. |
| Restore the heater | Turn the water heater back on only once it’s full of water. |
If the test strip still shows hard water after a day, check that the bypass is fully in service mode and that a regeneration has completed.
What to leave unsoftened
You don’t have to soften every tap. The Minnesota Department of Health notes many households skip outdoor hose bibs, toilets, and basement cold taps, and some soften only hot water.
Outdoor taps are the easy win, since softened water isn’t needed for lawns and some plants dislike the extra sodium. Many people also keep one unsoftened cold tap in the kitchen for drinking and cooking.
These choices are easiest to make before you cut into the line. Sketch your pipes and decide which branches tee off before the softener.
Troubleshooting new installs
A slow drip at the valve usually means an unsupported pipe or an O-ring without grease. Shut off, bypass, reseat and support the line.
No soft water after a day often traces to the bypass still being set to bypass, a hardness setting of zero, or no salt in the brine tank.
Water in the brine tank keeps rising points to a kinked brine line or a blocked drain line. Check both before calling the manufacturer.
A salt bridge is a hard crust that forms above the water, leaving salt that never dissolves. Break it gently with a broom handle, and avoid overfilling in humid spaces.
Fitting it into your home
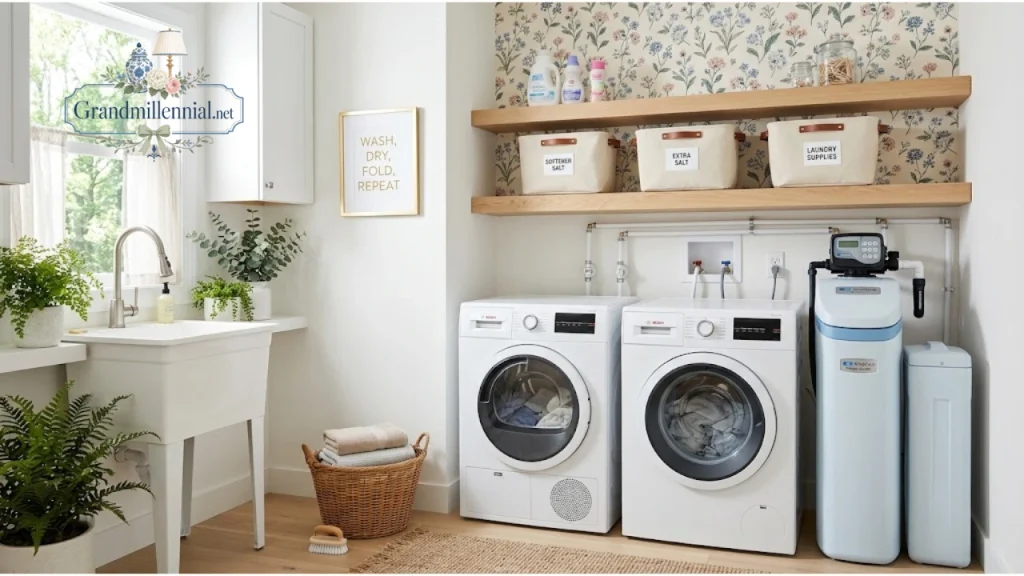
A home water softener usually lives in a basement, garage, utility closet or laundry room. Wherever it goes, plan for salt: 40 lb bags need a dry, reachable home.
In a laundry room, a sturdy shelf beside or above the unit keeps bags off the floor. These over-washer and dryer shelf ideas adapt easily for salt storage.
If you’re mid-renovation, ask your plumber to add a softener loop while walls are open; it’s far cheaper than retrofitting. These renovation planning tips cover how to sequence plumbing work, and they’re worth reading before any home addition.
Connected valves can send salt-low and leak alerts to your phone. If you’re building a smarter home, this 2026 smart home guide helps you pick devices that fit.
The payoff shows up quickly in the rooms you’ve invested in most: clearer glass on a small bathroom vanity and fewer spots on glossy tile from these modern kitchen backsplash ideas.
FAQs:
Where should a water softener be installed?
On the main cold-water line, after the main shutoff and before the water heater. On well systems, put it after the pressure tank and any sediment or iron filters.
Does a water softener drain need an air gap?
Yes. Manufacturers typically specify at least a 1.5-inch air gap between the drain hose and the drain to prevent back-siphoning, and many local codes require one.
Can I install a water softener myself?
Many homeowners can, especially with push-to-connect fittings and an accessible drain. Hire a licensed plumber if you need a permit, have corroded pipes, or lack a nearby drain.
How long does it take to install a water softener?
A straightforward install often takes two to four hours. Add time for tricky pipe access or long drain runs.
Should outdoor faucets be on softened water?
Usually not. Leaving hose bibs unsoftened saves salt and keeps extra sodium out of gardens.
What hardness should I set on my water softener?
Set it to your measured hardness in grains per gallon. If your water contains iron, check your manual for how much to add.
Do I need a permit to install a water softener?
It depends on where you live. Check with your local building department before you start.
Test your hardness, pick a certified, metered unit, and give yourself a calm half-day for the install. A well-placed home water softener is one of those upgrades you stop noticing, apart from the shine on your fixtures.